
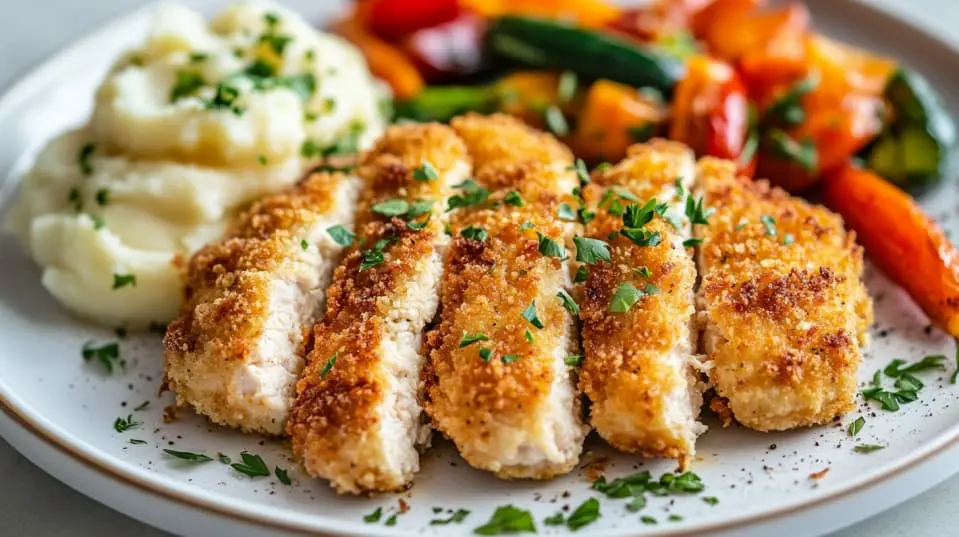
Who doesn’t love a crispy, golden-brown chicken cutlet that’s baked to perfection? If you’re craving that satisfying crunch without the guilt of frying, this baked chicken cutlet recipe is about to become your new go-to. It’s easy, irresistibly delicious, and made with simple ingredients you probably already have in your kitchen.
With a flavorful panko crust and tender, juicy chicken inside, this dish is perfect for a quick weeknight dinner, a kid-friendly meal, or even meal prep for the week. Plus, it pairs beautifully with your favorite dipping sauces or classic sides like roasted veggies and mashed potatoes.
Ready to make crispy baked chicken that tastes like magic? Let’s dive in!
Table of Contents
Table of Contents
Why You Will Love This Recipe
There’s something magical about a crispy baked chicken cutlet that’s golden brown on the outside and juicy on the inside. This recipe delivers that perfect balance of crunch and tenderness—without deep frying! Whether you’re a busy home cook or just looking for a healthier chicken cutlet recipe, here’s why you’ll love it:
✅ Crispy Without Frying
Thanks to a panko breadcrumb coating and a touch of olive oil, these cutlets turn out perfectly crisp in the oven—no messy frying required! Learn more about the science of baking for crispiness.
⏳ Quick & Easy
With just a few pantry staples and 30 minutes from start to finish, this recipe is perfect for a hassle-free weeknight dinner.
🥘 Versatile & Customizable
Serve it with pasta, on a sandwich, or with a side of roasted veggies. You can even switch up the seasonings to suit your taste!
🍽️ Family-Friendly
Even picky eaters will love the crispy, oven-baked goodness of this dish. Plus, it’s great for meal prepping—make a batch and enjoy throughout the week!
Ready to make baked chicken cutlets that taste like magic? Let’s get started!
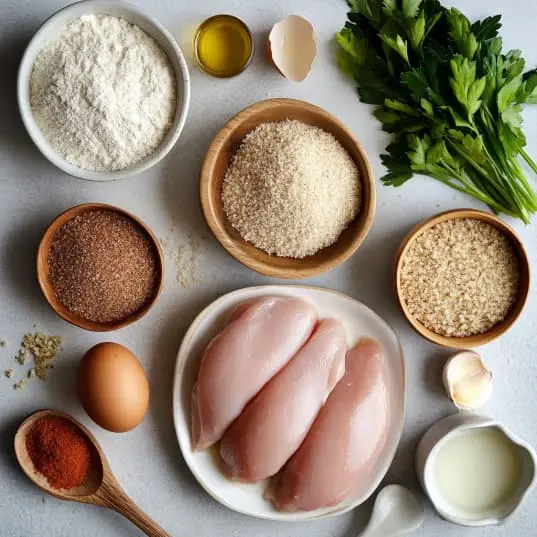
Ingredients for Baked Chicken Cutlet Recipes
Gathering the right ingredients is the first step toward making these crispy baked chicken cutlets that taste like magic! Here’s everything you’ll need to make this simple yet flavorful dish:
For the Chicken Cutlets:
- 4 boneless, skinless chicken breasts (pounded thin for even cooking)
- 1 cup panko breadcrumbs (for that perfect crunch)
- 1/2 cup grated Parmesan cheese (adds rich flavor and depth)
- 2 large eggs (for the egg wash)
- 1/2 cup all-purpose flour (helps the coating stick)
- Salt and pepper to taste
- 1 teaspoon garlic powder
- 1 teaspoon onion powder
- 1/2 teaspoon paprika (for a subtle smoky flavor)
For Baking:
- 2 tablespoons olive oil (helps crisp the cutlets in the oven) (Learn about healthy fats)
Optional Garnishes & Sides:
- Lemon wedges (for a fresh, zesty finish)
- Dipping sauces like marinara, ranch, or honey mustard
- Mashed potatoes, roasted vegetables, or a simple salad for serving
Pro Tip:
For extra flavor, try adding dried herbs like oregano or basil to your breadcrumb mixture. It’s a simple way to take your baked chicken cutlet to the next level!
Now that you have everything you need, let’s get ready to make some mouthwatering chicken cutlets that are crispy, tender, and full of flavor!
How to Make Baked Chicken Cutlet Recipes
Creating these crispy baked chicken cutlets is straightforward and rewarding! Follow the steps below to achieve perfectly baked, golden-brown cutlets that are juicy on the inside and crispy on the outside.
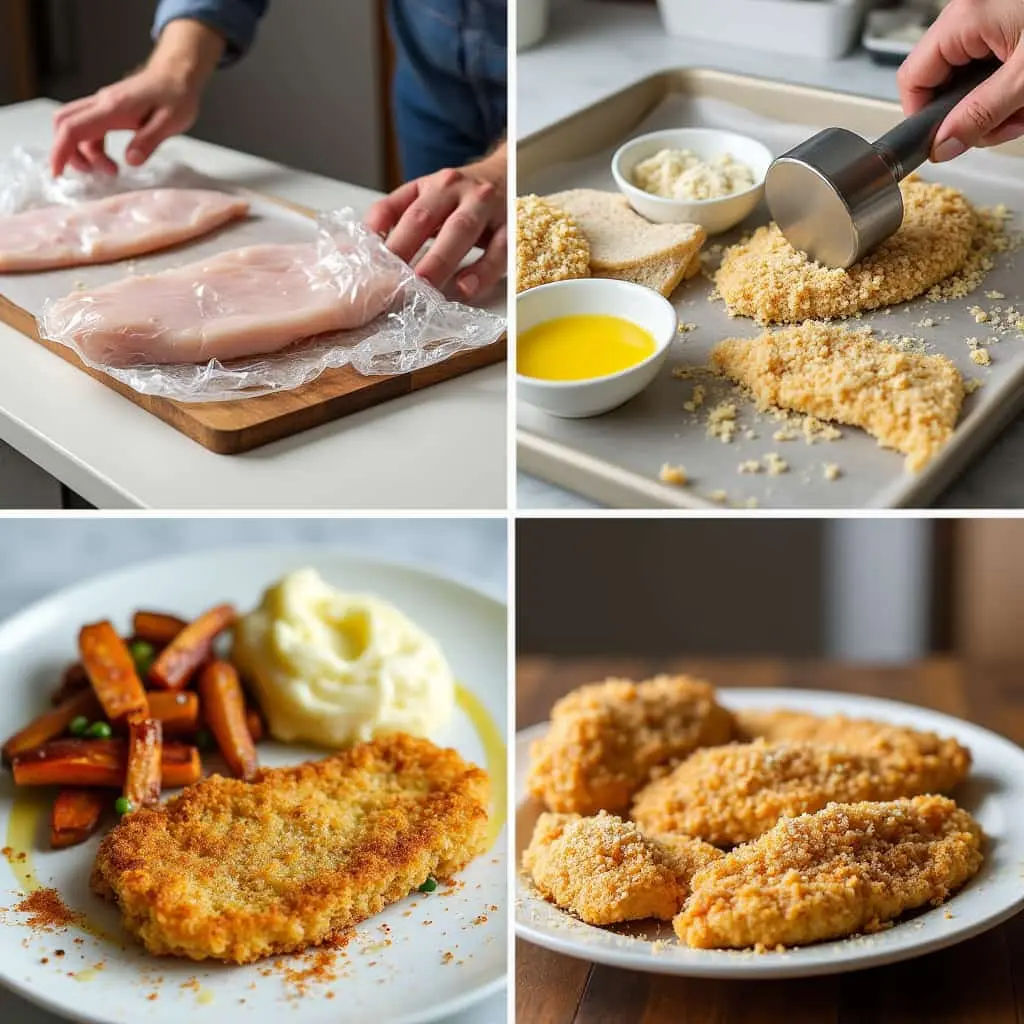
Step 1: Prep the Chicken
Begin by flattening your chicken breasts so they cook evenly. Aim for about 1/2 inch thickness.
- To do this, place the chicken between two sheets of plastic wrap or in a ziplock bag, then gently pound with a meat mallet or rolling pin.
- After the chicken is evenly flattened, dab it dry with a clean towel to remove excess moisture. This ensures the coating sticks well.
Step 2: Set Up Your Breading Stations
To achieve the perfect crust, you’ll need three separate dishes for breading:
- Flour Station: In a shallow dish, combine 1/2 cup of flour, salt, and pepper.
- Egg Wash: In another dish, beat two eggs with a tablespoon of water until smooth.
- Breadcrumb Coating: In the third dish, mix 1 cup of panko breadcrumbs with 1/2 cup of grated Parmesan cheese, garlic powder, onion powder, and paprika for flavor.
Step 3: Coat the Chicken
- First, coat each chicken breast in the flour mixture, making sure it’s fully covered.
- Next, dip it into the egg wash, letting the excess drip off.
- Finally, press the chicken into the breadcrumb mixture, ensuring a thick, even coating. Gently press the breadcrumbs to make sure they stick.
Step 4: Bake the Chicken Cutlets
- Preheat your oven to 400°F (200°C). Line a baking sheet with parchment paper, or lightly grease it with olive oil.
- Place the breaded chicken cutlets on the baking sheet, making sure they aren’t overlapping for even cooking.
- Lightly spray or drizzle olive oil over the top of the cutlets to help them brown and crisp up.
- Bake for 20-25 minutes, flipping the cutlets halfway through, until they’re golden and have reached an internal temperature of 165°F (75°C). Check USDA’s food safety guidelines.
Step 5: Serve and Enjoy
Allow the baked chicken cutlets to rest for a few minutes after baking, so the juices can settle and the chicken stays moist.
Serve with your favorite dipping sauces, or pair with sides like roasted veggies, mashed potatoes, or a fresh salad for a complete meal.
Serving Suggestions
Now that your crispy baked chicken cutlets are fresh out of the oven, it’s time to get creative with how you serve them! These cutlets are incredibly versatile and can be paired with a variety of sides and toppings to suit any meal or occasion. Here are some delightful serving ideas that will take your meal to the next level:
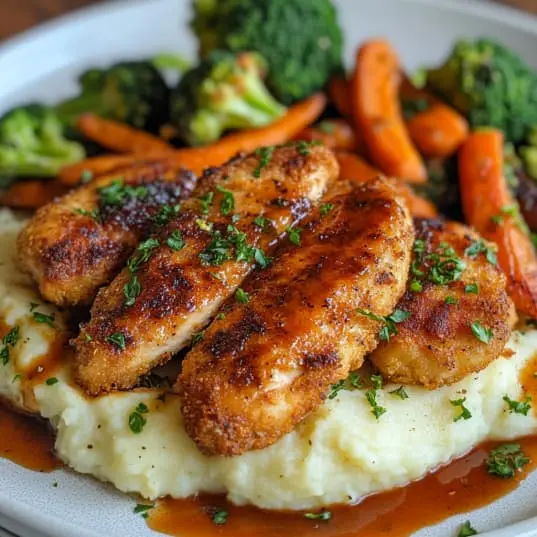
1. Pair with Classic Comfort Sides
To create a well-rounded meal, serve your chicken cutlets with comforting sides that balance out the crispy texture. Consider:
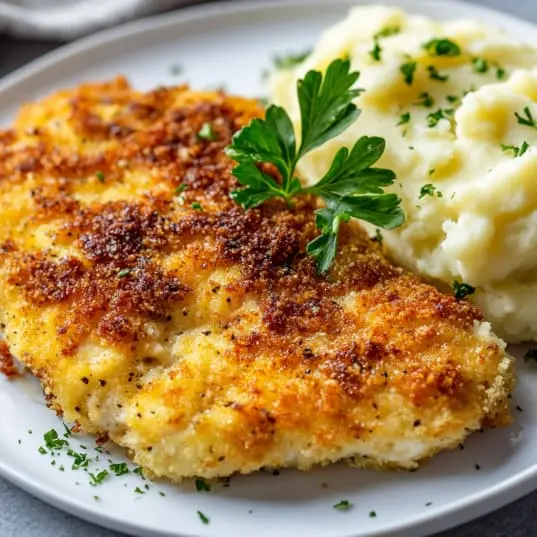
- Creamy mashed potatoes – The rich, buttery texture of mashed potatoes complements the crispiness of the cutlets beautifully.
- Roasted vegetables – A side of seasoned roasted carrots, broccoli, or sweet potatoes adds color and nutrition to your plate.
2. Make a Sandwich
For a quick and satisfying meal, turn your crispy baked chicken cutlets into a delicious sandwich. Layer the cutlet on a toasted bun with:
- Fresh lettuce
- Sliced tomato
- A drizzle of ranch dressing or honey mustard for added flavor
This is a great option for a family-friendly lunch or a game-day snack!
3. Top with a Fresh Salad
If you’re looking to keep things light, serve your chicken cutlets on a bed of fresh greens. This makes for a refreshing, healthy meal. Try:
- Mixed greens, spinach, or arugula for a fresh base
- Creamy avocado slices for richness
- A handful of cucumber slices for a cool, refreshing crunch
- Drizzle with balsamic vinaigrette or a tangy lemon dressing
This is a perfect option for a light dinner or a lunch that’s both nutritious and satisfying.
4. Serve with Dipping Sauces
Add a fun twist to your cutlets by serving them with different dipping sauces. These will enhance the flavor and give you a variety of taste experiences:
- Marinara sauce for a classic touch
- Ranch dressing for a creamy dip
- BBQ sauce for a smoky kick
- Garlic aioli for a rich, savory flavor
5. Serve Over Pasta
For a heartier meal, place your chicken cutlet on a plate of pasta.
- Spaghetti or fettuccine tossed in a light tomato sauce or a creamy Alfredo sauce makes for a delicious and filling combination.
- Add a sprinkle of Parmesan cheese on top to elevate the dish
Conclusion
Congratulations! You’ve just made a batch of crispy baked chicken cutlets that are sure to impress anyone at your table. With their golden, crunchy exterior and juicy, tender interior, these cutlets make for a delicious and versatile meal that’s easy enough for weeknight dinners but special enough for guests. Whether you serve them with mashed potatoes, on a sandwich, or over a fresh salad, the possibilities are endless!
Why You’ll Love These Chicken Cutlets:
- Simple & Quick: The recipe uses basic ingredients you probably already have in your kitchen, and the preparation is straightforward, making it perfect for busy days.
- Customizable: Whether you like a spicier coating or a different dipping sauce, you can easily tweak the flavors to your taste.
- Family-Friendly: Kids and adults alike will love the crispy crunch and tender chicken inside.
So next time you’re in the mood for a comforting, satisfying dish, reach for this recipe. Your homemade baked chicken cutlets will become a new family favorite! Don’t forget to share your results and tag us if you try out the recipe. Enjoy your meal!
FAQs
1. Is it better to bake chicken at 350 or 400?
Baking chicken at 400°F (200°C) is typically recommended for crispy, golden-brown results. Higher heat helps achieve a nice crust while keeping the inside juicy. However, baking at 350°F (175°C) is also a good option for a slower, more even cook, especially for thicker cuts of chicken. It really depends on the desired texture!
2. Is it better to fry or bake breaded chicken?
Baking breaded chicken is a healthier alternative to frying, as it uses less oil while still achieving a crisp coating. Baking at a high temperature (around 400°F) can help mimic the crispy texture of frying without the extra fat. Frying, however, provides an extra crispy texture and faster cooking time if you’re in a rush.
3. How long should I bake thin sliced chicken breast?
Thinly sliced chicken breasts typically bake for 15-20 minutes at 400°F (200°C). Make sure to check for an internal temperature of 165°F (75°C) to ensure they are fully cooked. If the pieces are very thin, they might cook a bit faster, so keep an eye on them to avoid overcooking.
4. Should I cover my chicken when I bake it in the oven?
Generally, you don’t need to cover your chicken while baking. Leaving it uncovered allows the chicken to develop a crispy, golden exterior. However, if you prefer a slightly juicier result or are cooking at a lower temperature, you can cover the chicken with foil for part of the cooking time and then uncover it during the last few minutes to crisp up the coating.